
Discover Your Creative Kitchen AI Companion
Let our assistant inspire your next meal!
Simply provide a recipe idea or the ingredients you have, and ScrummyChef will instantly come up with a new recipe just for you.
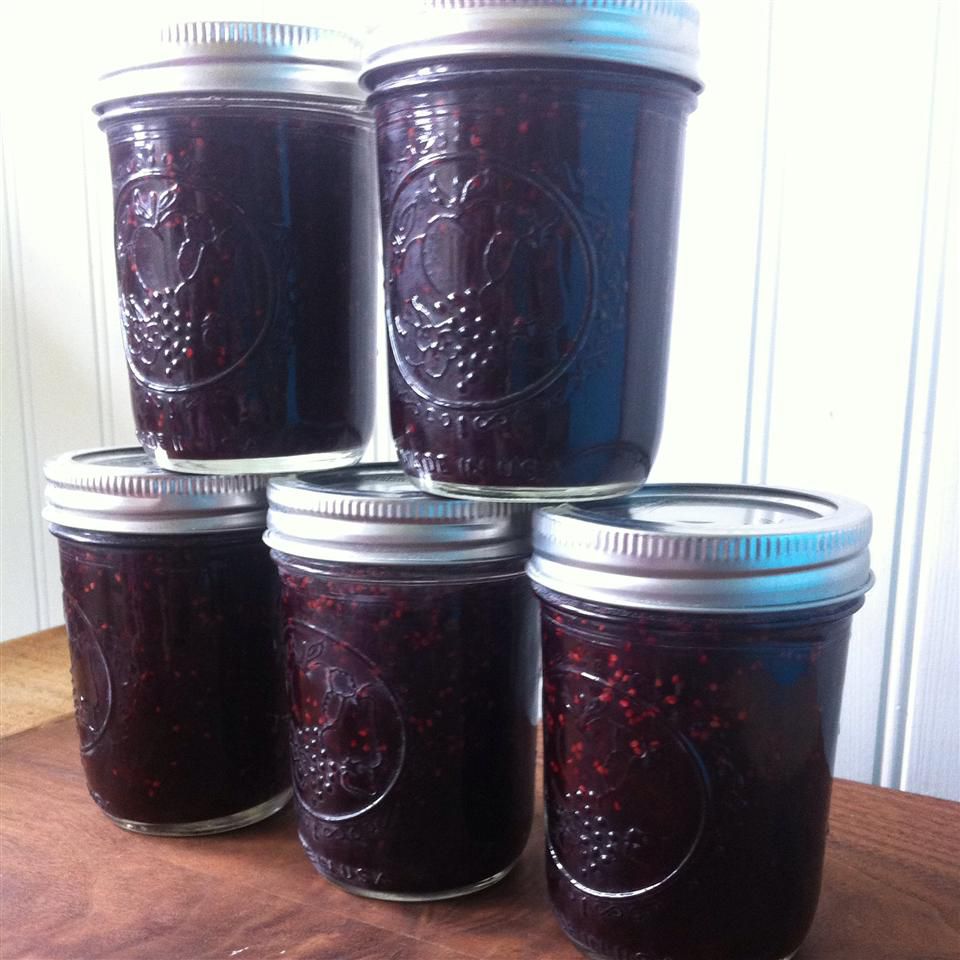
Mulberry Preserve
Save
Rate
Tap to rate
PREP TIME
10 min
COOKING TIME
20 min
TOTAL TIME
50 min
SERVINGS
45 servings
Ingredients
- 6 cups mulberries
- 1 tablespoon water, or more as needed
- 2 cups water
- 3/4 cup white sugar
- 1 (3 ounce) package strawberry-flavored gelatin (such as Jell-O®)
- 1 (1.75 ounce) package powdered fruit pectin
- 8 half-pint canning jars with lids and rings
Instructions
1
Combine the mulberries and 1 tablespoon of water in a large cooking vessel; heat until boiling point. Lower the temperature, cover the pot with a lid, and cook gently, stirring constantly, until the berries have broken down, 15 to 20 minutes. Crush the softened berries using a manual mashing tool.
2
Combine 2 cups of water, sugar, strawberry-flavored gelatin, and pectin in a mixing container; stir until the gelatin has dissolved. Mix the gelatin mixture into the crushed mulberries; heat the combination until boiling point.
3
Sterilize the jars and lids in a pot of boiling water for at least 5 minutes. Fill the hot, sterilized jars with the boiling mulberry mixture, leaving a small gap between the top of the jar and the lid. Use a utensil to scrape away any air bubbles that may have formed inside the jar. Wipe the edges of the jars with a damp cloth to remove any food residue. Secure the lids onto the jars, and screw on the rings firmly.
4
Position a rack at the bottom of a large cooking pot and fill it halfway with water; bring to the boil. Place the jars into the boiling water using a lifting device, leaving a small gap between each jar. Add more boiling water if necessary to ensure the water level is at least 1 inch above the tops of the jars. Bring the water to a rolling boil, cover the pot with a lid, and cook for approximately 15 minutes.
5
Remove the jars from the cooking pot and place them on a cloth-covered or wooden surface, several inches apart, until they have cooled down. Once cool, press the top of each lid with your finger to ensure a tight seal; the lid should not move up or down at all. Store the sealed jars in a cool, dark area.


© 2024 Scrummy Chef - All rights reserved